
We can now begin the manufacture of the stilt’s leg. We will also prepare other pieces for the following assembly.
Cut the cleat at right angles into four pieces :
- Two lengths of 50cm (60cm for a large teenager or adult) that will support the calves.
- Two lengths of 40-50-60cm (optional) that will be the stilt’s leg.
The leg’s length depends on your motivation and your level of practice :
- For children under 8 : 40cm will be enough to discover the work balance.
- For older children, teenagers or beginning adults : try 60cm.
- For experienced teenagers or adults : try from 80 to 100 cm and have fun !
Bevelling of the plywood
Take the 4 boards of 16cm x 10cm and cut in each a bevel of 6.5cm side : pencil, ruler, jigsaw and so on !

Keep on using the jigsaw on the 2 boards of 25x10cm with 4 bevels of 3cm x 1cm (see photo). They will be used later.
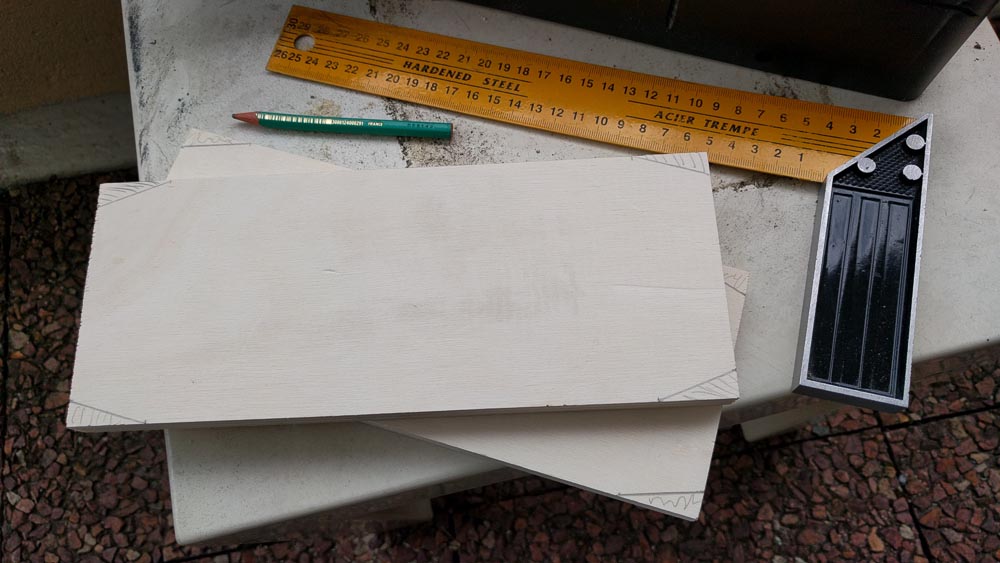
The end result should look like this:

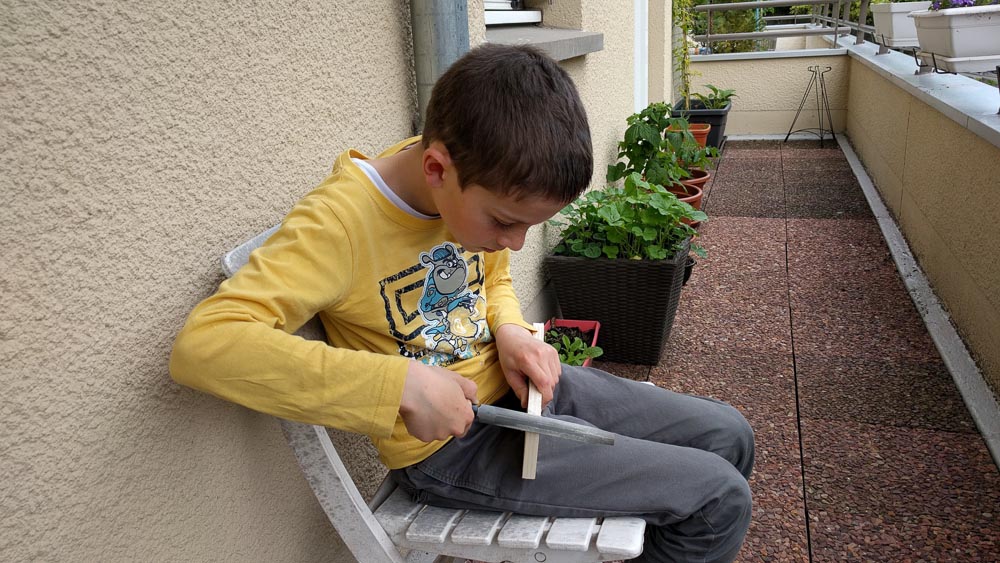
Now sand all angles to soften them and eliminate splinters.
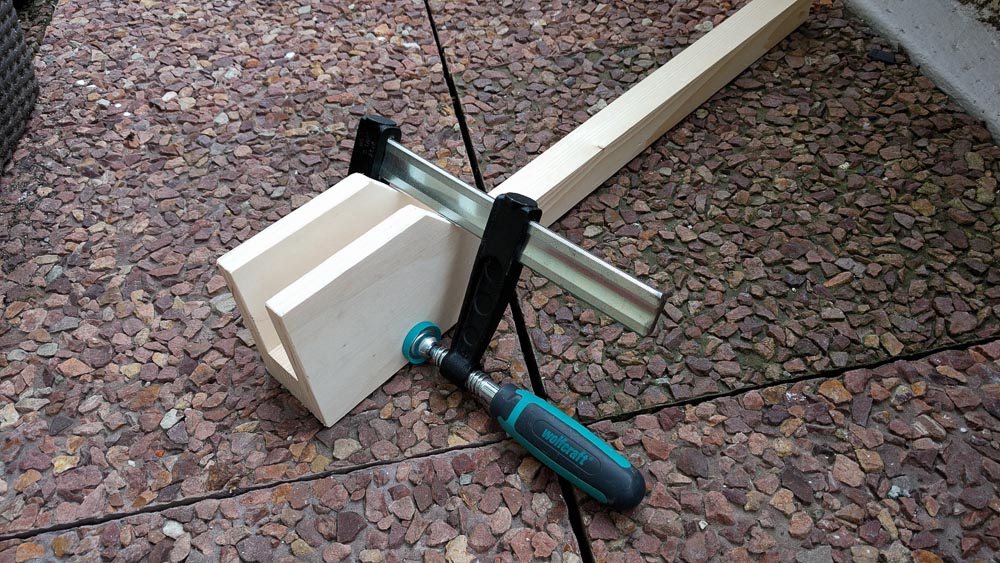
Sandwich !
It’s not the break time yet but the time to play with the clamp.
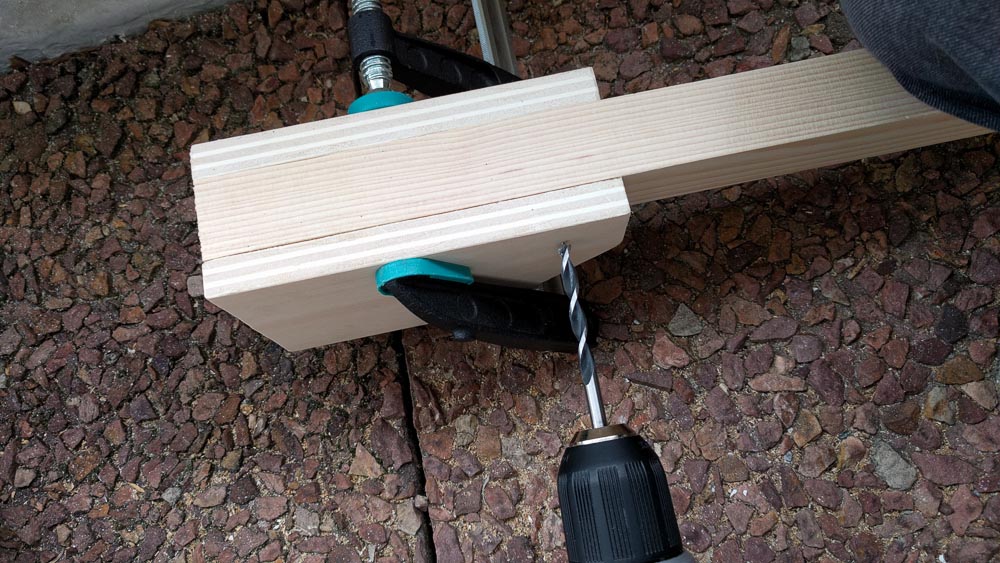
Gather one leg and two 16x10cm boards as the above photo. The top of the leg and the non-beveled width of the board must be well aligned. Same for the non-beveled length and the cleat. Arrange the clamp as shown in the picture.
With your drill and a 6-inch wood drill, pierce the three elements at once. The piercing must be well perpendicular to the leg and well centered.
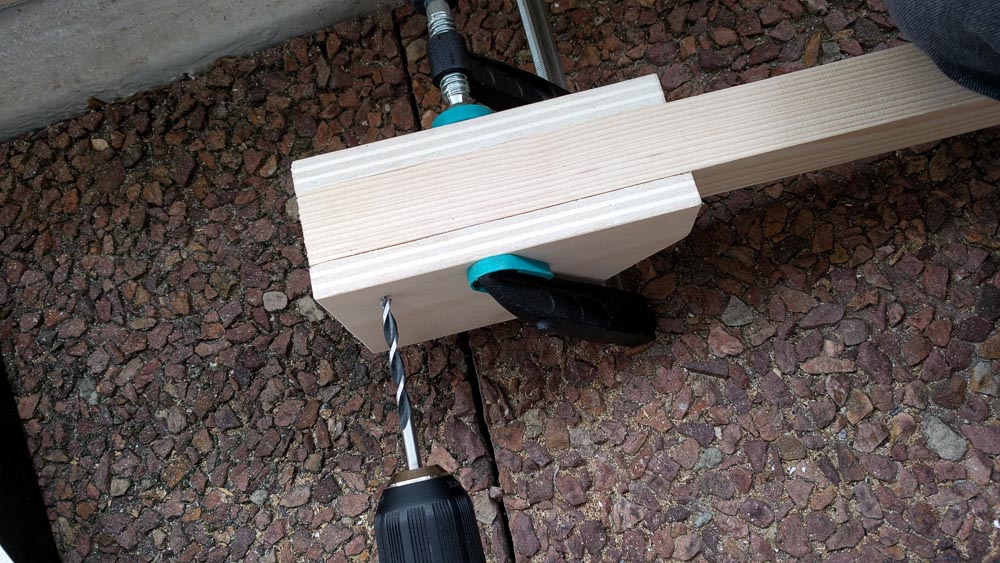
Same thing to the right of the clamp (see photo).
Bolting
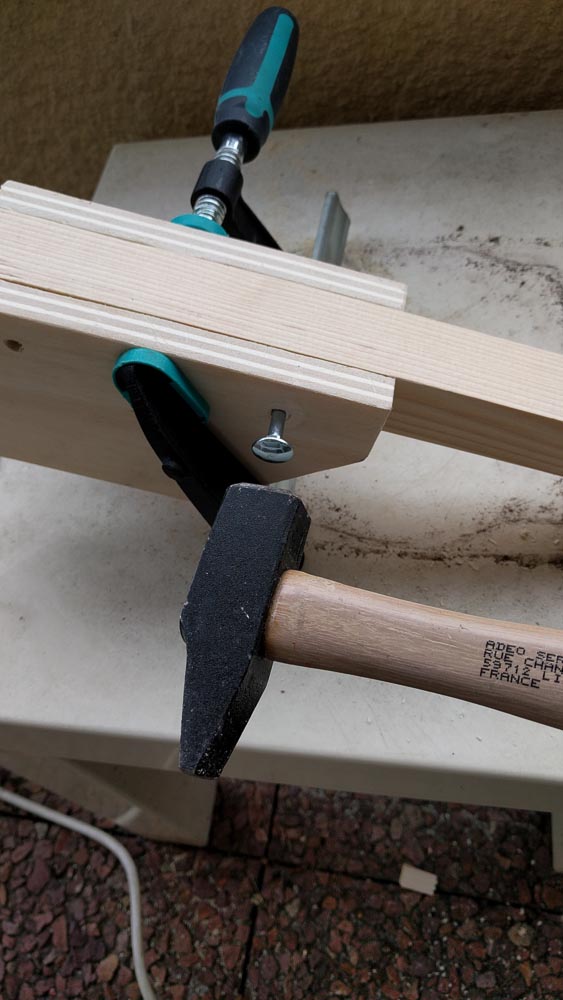
Don’t touch the clamp yet ! Take 2 TRCC bolts you hit as shown in the picture. The head will sink into the wood and get stuck.
On the other side, add a flat washer, a lock washer and the nut. Tighten strongly !
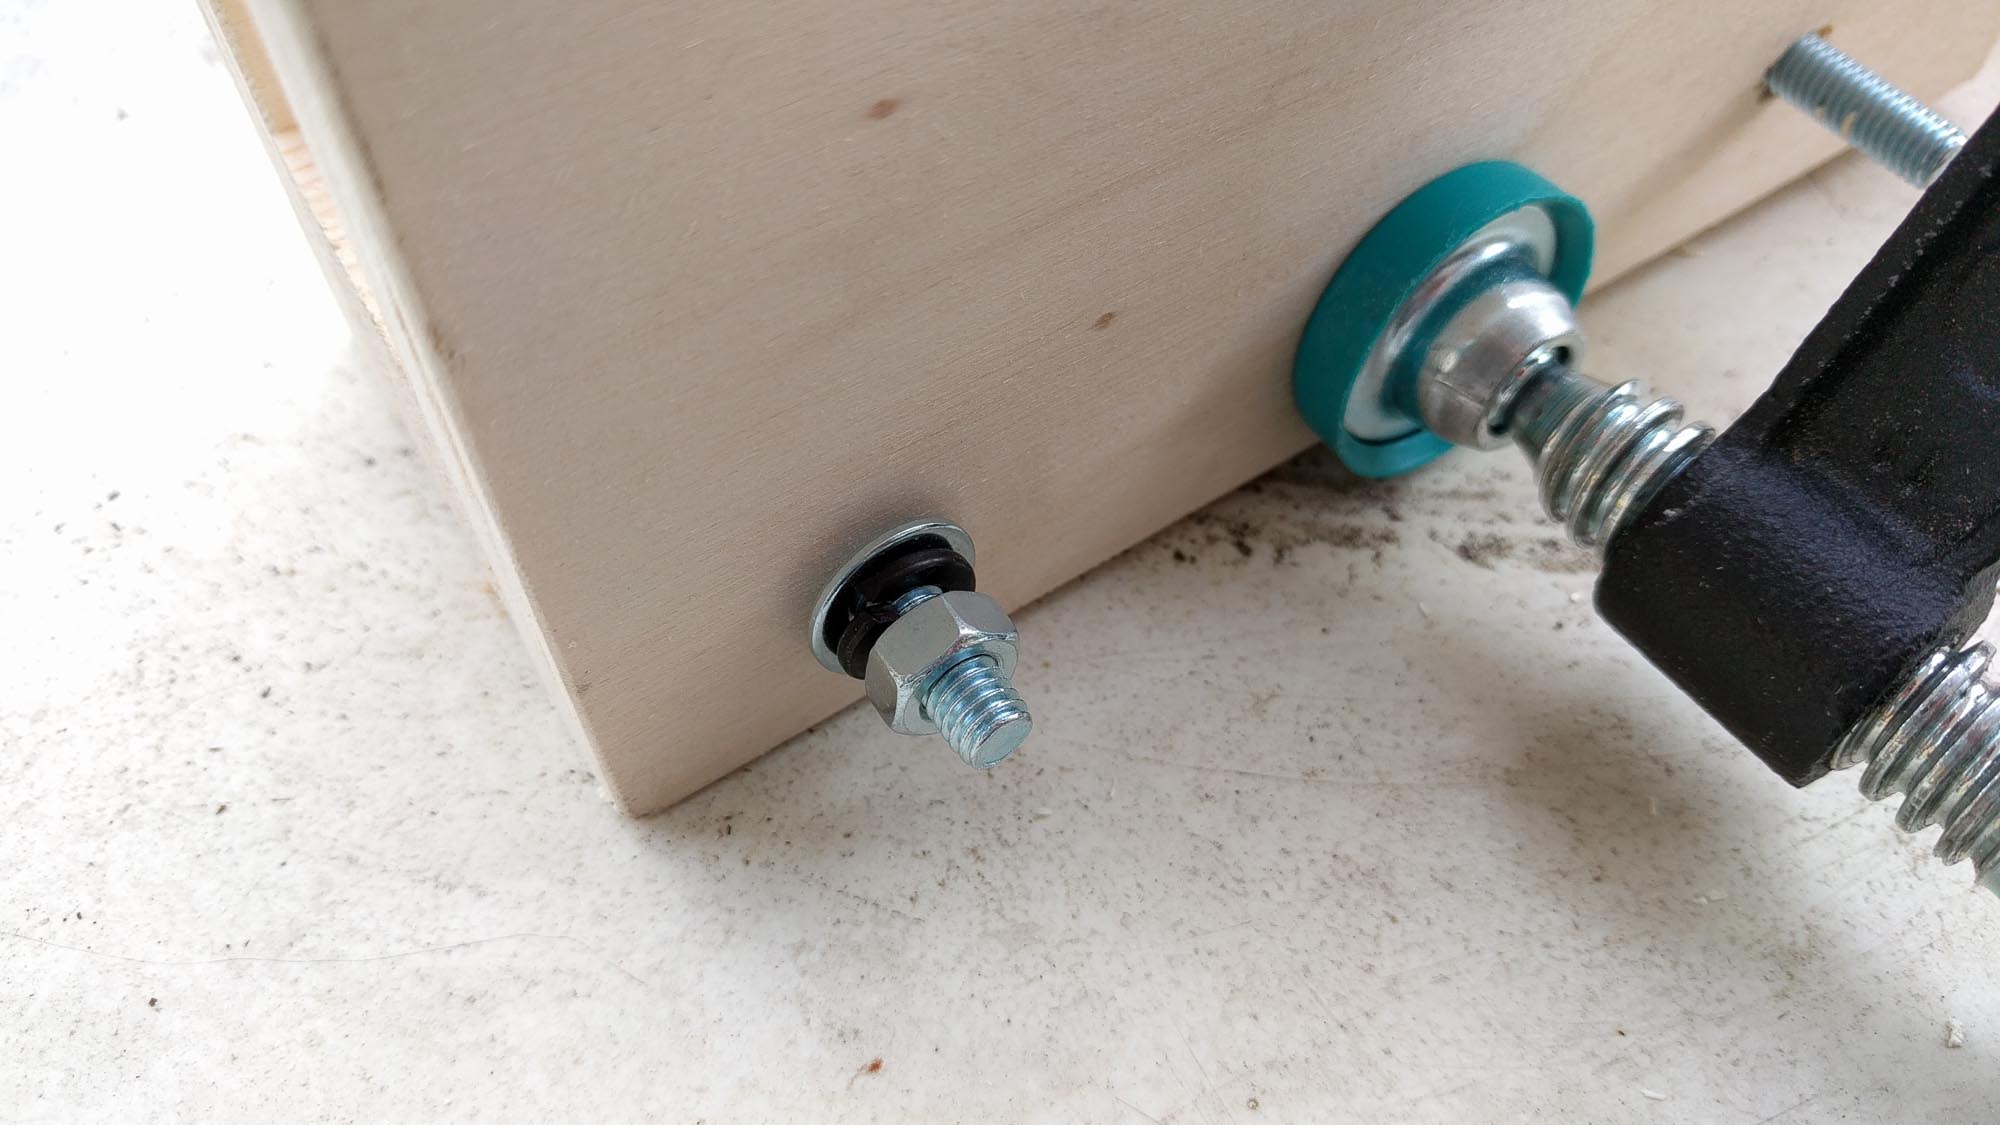
You can now remove the clamp and admire your work.
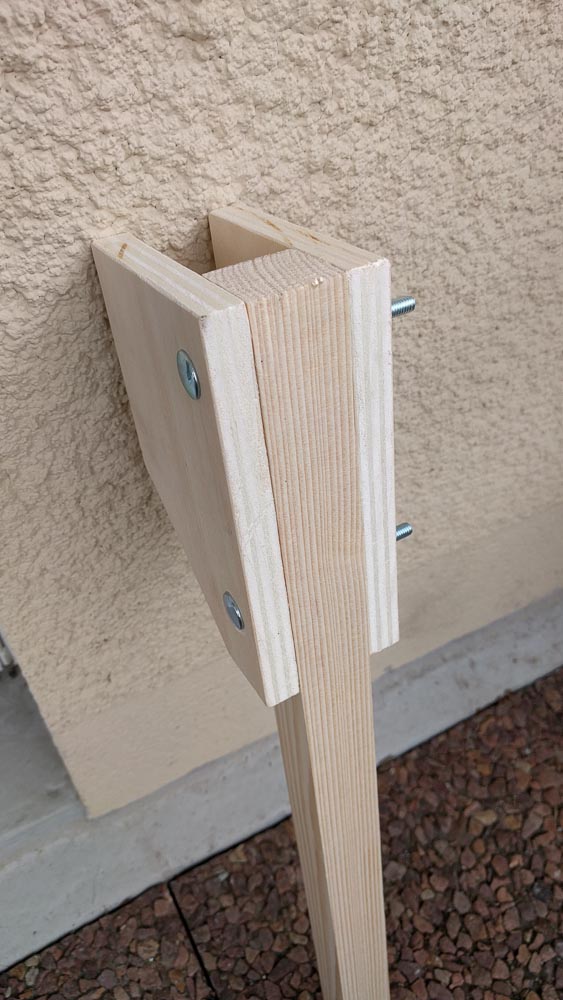
Do the same thing for the second leg. Remember to place the bolts symmetrically : the bolt heads toward the front of each stilt.
Then go to Step #3 Assembly of the calf support.
Was this tutorial helpful?
MAKE A DONATION
Please make a small donation to help us maintain our website.
WARNING:
Stilts and tutorial (text + photos) are under Creative Commons license BY-NC-SA.
Commercial use forbidden.
