
We will now add the support that allow the stilt to remain attached to your leg.
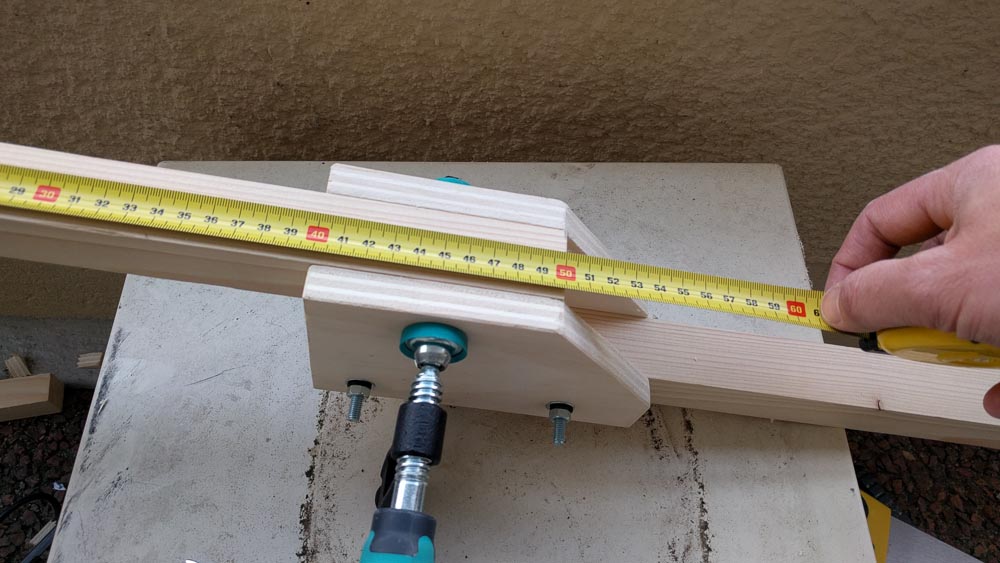
Take one of the last pieces of cleats you cut in step #2 and insert it into the sandwich previously made for the leg. As for the leg of the stilt, the piece of cleat and the boards must be aligned. Place the end of the cleat at the corner of the bevelled part (see photo).
You will have 10cm of cleat locked in the sandwich and all the rest that will be used to hold the calf (about 40cm or more depending on the size of the stilt walker).
Block all pieces with the clamp (see photo).
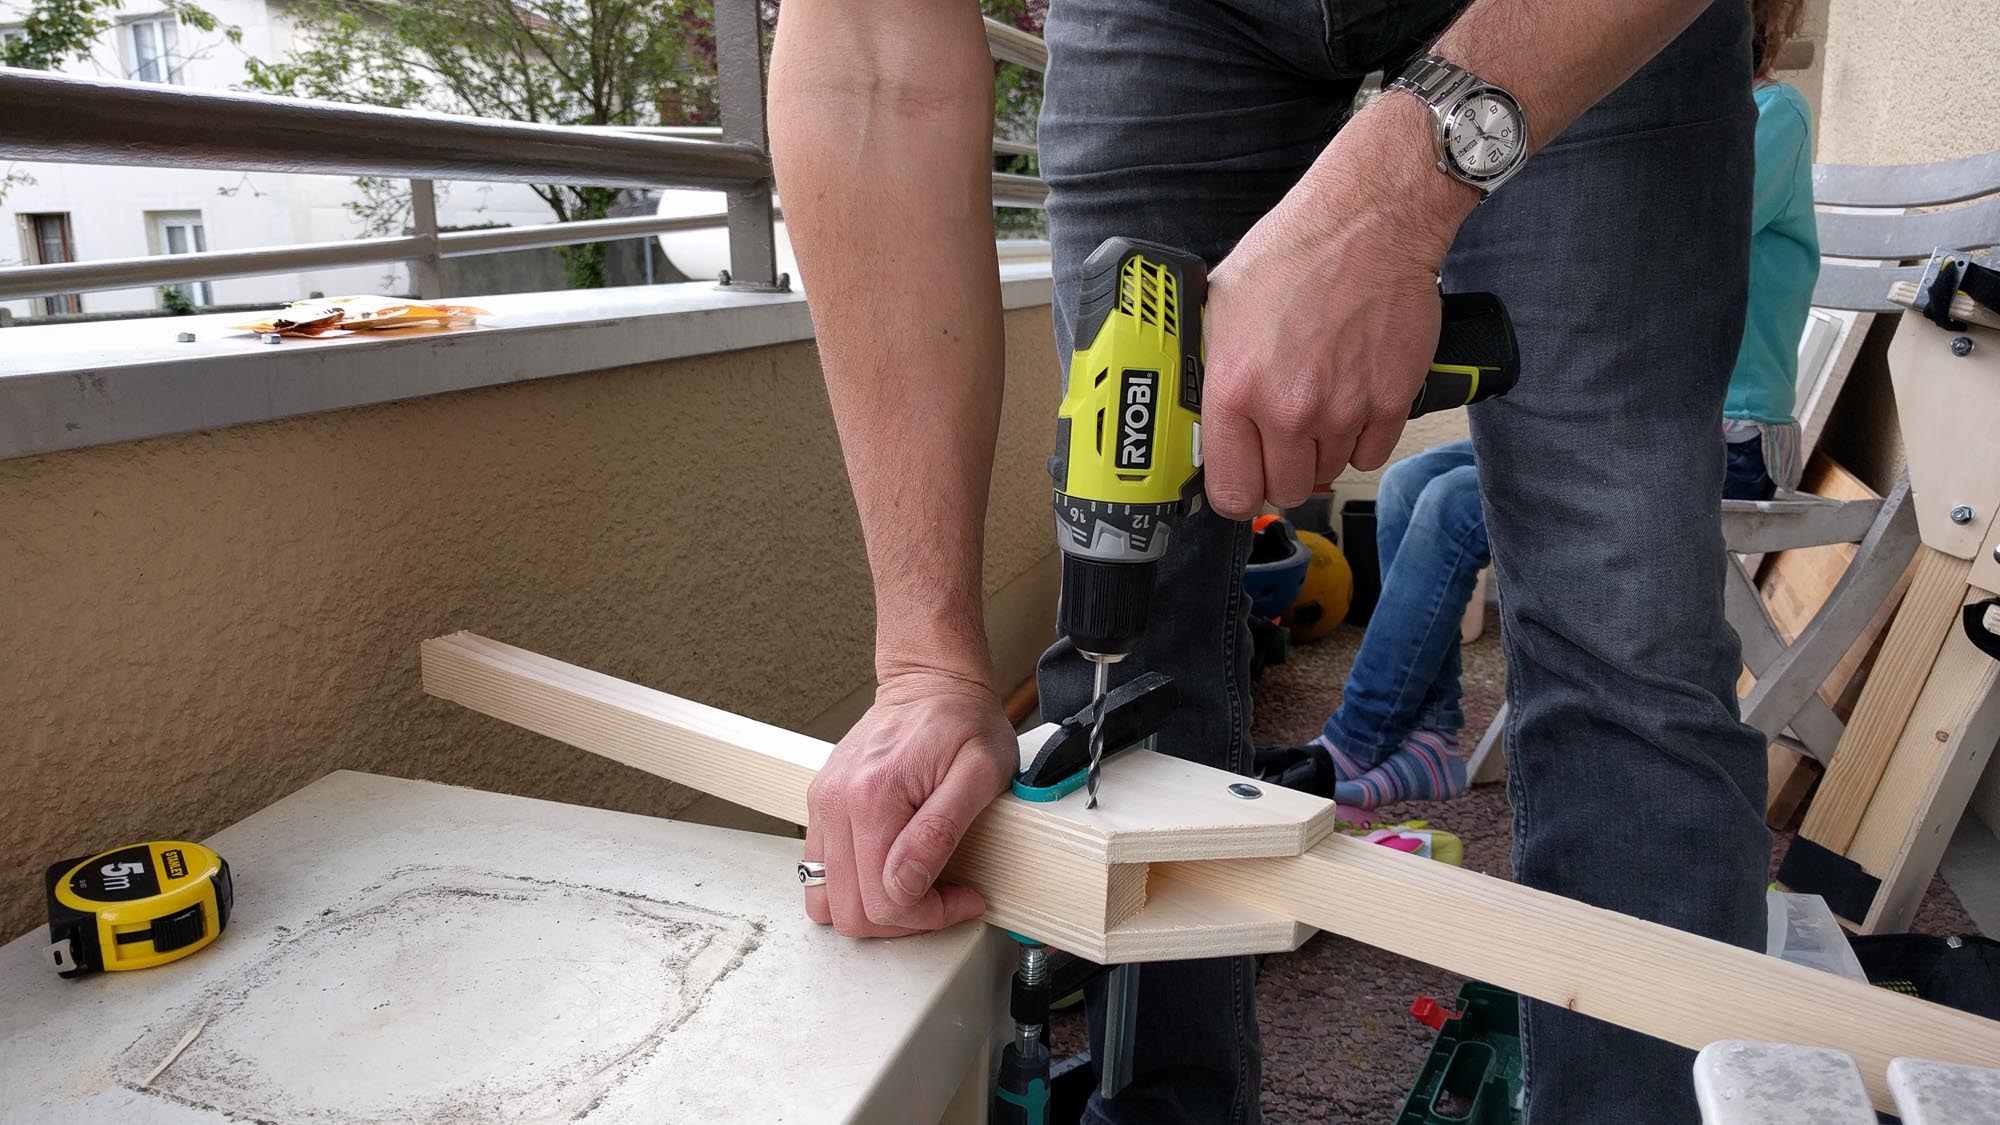
The following is similar to the leg assembly : pierce with the drill of 6, right and left of the clamp, well perpendicular and well in the center of the cleat.
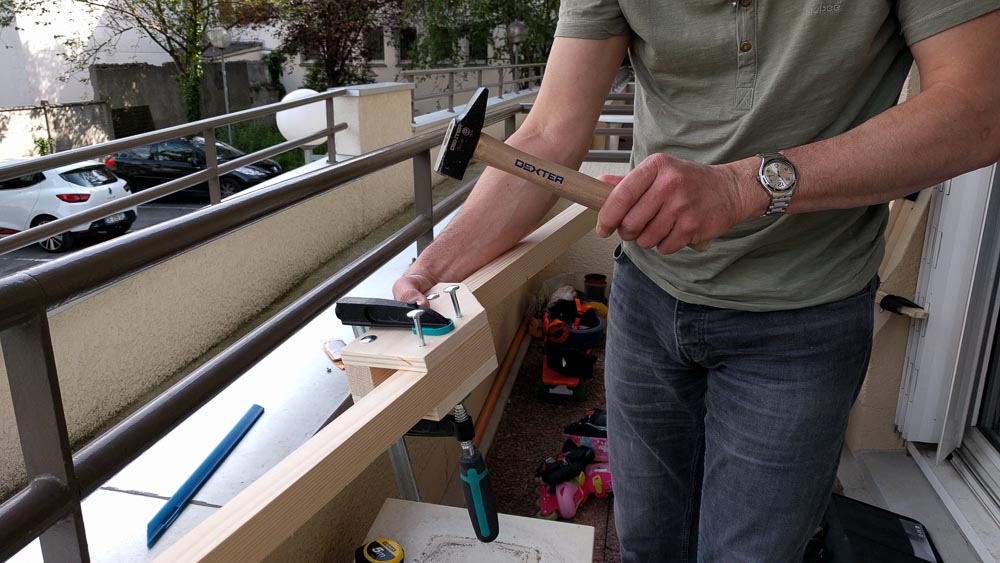
TRCC bolt… hammer… flat washer + lock washer + nut… Squeeze strongly… You’re done !
Repeat the step for the second stilt and you will have two nice wooden creations that begin to look like stilts.
Let’s go now to Step #4 Fixing the footrest.
Was this tutorial helpful?
MAKE A DONATION
Please make a small donation to help us maintain our website.
WARNING:
Stilts and tutorial (text + photos) are under Creative Commons license BY-NC-SA.
Commercial use forbidden.
